
- Preparing Your Space for a Home Photography Studio
- Selecting Essential Equipment for Your Home Studio
- Mastering Home Studio Lighting Techniques
- Optimizing Studio Layout and Storage Solutions
- Case Study: Successful Home Studio Setup and Tips
- Final Thoughts on Building Your Home Photography Studio
1. Preparing Your Space for a Home Photography Studio
Creating a dedicated area for your home photography studio is the foundation for success. Whether you have a spare room, a basement corner, or even a section of your living room, the key is to choose a space that provides enough room for your equipment and allows flexibility in shooting angles.
Consider factors such as natural light, wall color, and noise levels. For example, a room with neutral-colored walls and minimal reflective surfaces will help you control lighting better. If possible, avoid rooms with excessive ambient light or distractions that can interfere with your shoots. Many successful photographers recommend using blackout curtains or window films to maintain consistent lighting conditions.
Another practical tip is to assess the power outlets and ventilation. Photography equipment often requires multiple plugs for lights, cameras, and computers, so having accessible outlets is vital. Good airflow also helps keep the room comfortable during extended sessions.
1.1 Understanding Your Photography Needs
Before setting up, analyze what types of photography you intend to focus on — portraits, product photography, or creative art shots. This decision influences your space requirements and the equipment you will invest in. For instance, portrait photography may need larger backdrops and softbox lights, while product photography might benefit from macro lenses and light tents.
1.2 Making Use of Limited Space
If your home doesn’t offer large spaces, don’t worry. Many photographers have transformed small areas into efficient studios by using collapsible backdrops and portable lighting kits. The secret lies in smart organization and multi-functional equipment, making the most out of every square foot.
2. Selecting Essential Equipment for Your Home Studio
Setting up your home photography studio requires an investment in key equipment, which will directly affect the quality of your work. The basics include a reliable camera, lenses, lighting gear, backdrops, and a sturdy tripod.
2.1 Choosing the Right Camera and Lenses
While smartphones have advanced cameras, investing in a DSLR or mirrorless camera is essential for serious studio work. Consider lenses based on your photography style — a 50mm prime lens is perfect for portraits, while macro lenses excel in product shots.
2.2 Lighting Equipment Essentials
Lighting makes or breaks your images. Beginners can start with continuous LED lights or affordable softboxes to diffuse harsh light. As you progress, consider adding strobes or flash systems for more control. Reflectors and diffusers are inexpensive tools that significantly improve lighting quality by manipulating shadows and highlights.
2.3 Backdrops and Props
Backdrops set the tone of your photos. You can choose from solid colors, textured fabrics, or themed scenes depending on your brand or creative vision. Don’t underestimate simple props — even everyday objects can add personality to your shots when used thoughtfully.
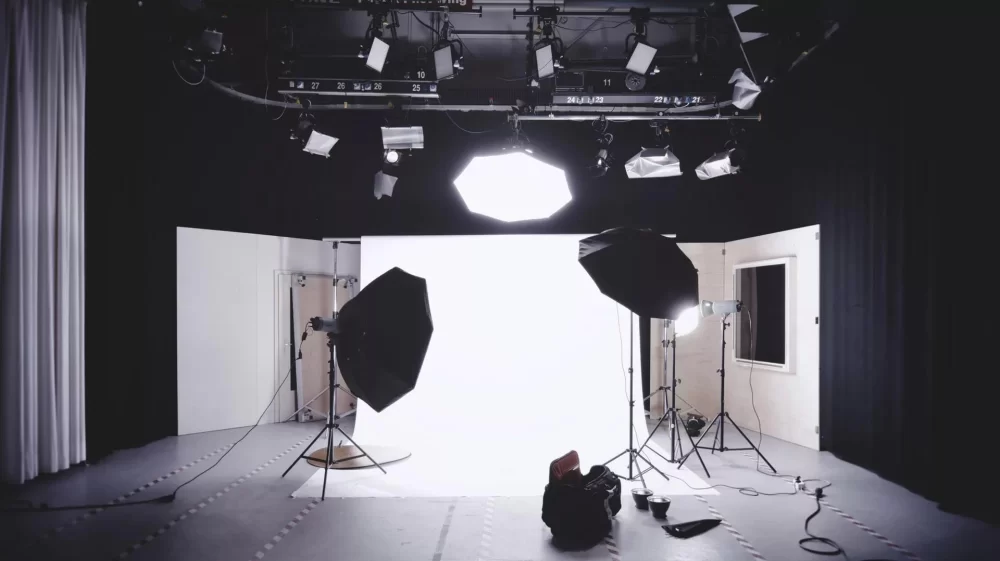
3. Mastering Home Studio Lighting Techniques
Lighting is the heartbeat of any photography studio. Learning how to position and modify light sources can elevate your images from ordinary to extraordinary.
3.1 Natural Light vs Artificial Light
Natural light is free and flattering but often unpredictable. Many home studios blend natural light with artificial sources to maintain consistency. For example, using sheer curtains to soften window light combined with LED panels allows for more control.
3.2 Three-Point Lighting Setup
This classic lighting arrangement consists of a key light, fill light, and backlight, creating dimension and depth. In a home studio, you can use affordable continuous lights or flashes to replicate this setup. Experimenting with angles and intensities will help you understand how shadows sculpt your subject.
3.3 Practical Lighting Tips
Always test your lighting before a shoot. Small changes in distance or angle can dramatically alter mood and clarity. Using tools like light meters or smartphone apps designed for photographers can help fine-tune your setup.
4. Optimizing Studio Layout and Storage Solutions
Efficiency in your home photography studio depends heavily on how well your space is organized. A cluttered or poorly arranged studio can slow down your workflow and reduce creativity.
4.1 Creating Zones for Shooting and Editing
Separate your shooting area from your editing or computer workspace. This division helps maintain focus and keeps equipment safe. Ergonomic seating and proper desk height for editing sessions prevent fatigue and increase productivity.
4.2 Storage Ideas for Equipment and Props
Use shelving units, rolling carts, and labeled bins to keep your gear accessible and organized. Many photographers find pegboards helpful for hanging small accessories like cables, clamps, and reflectors. Keeping everything tidy minimizes setup time and frustration.
4.3 Cable Management and Safety
Proper cable management not only looks professional but also prevents accidents. Velcro straps, cable clips, and under-desk trays are affordable solutions to keep wires organized and out of the way.
5. Case Study: Successful Home Studio Setup and Tips
Consider the example of Anna, a freelance portrait photographer who transformed her small attic space into a functional home studio. Starting with just a DSLR and a basic reflector, she gradually added softbox lights and a backdrop stand from Photo Studio, which offers tailored equipment for home setups.
Anna’s key to success was focusing on modular equipment that fit her space and shooting style. She used blackout curtains to control light and invested time in learning three-point lighting techniques. Over six months, her portraits gained a professional look, attracting more clients without the expense of renting commercial studio space.
This story highlights how thoughtful planning, incremental investment, and practical learning can help anyone build a home photography studio that meets their needs.
6. Final Thoughts on Building Your Home Photography Studio
Setting up a home photography studio is an exciting journey that blends creativity with technical skills. By carefully selecting your space, investing in essential gear, mastering lighting, and maintaining an organized layout, you can create a productive environment tailored to your artistic goals.
If you’re looking for quality equipment or expert advice, Photo Studio offers a curated selection of products and services designed to help photographers at every level. Whether you need lighting kits, backdrops, or even professional consultations, they provide the resources to make your home studio dreams a reality.
Remember, the best studio is one that inspires you and adapts as your skills grow. Take your time, experiment boldly, and enjoy the process of creating stunning images from the comfort of your own home.


