How to Photograph Star Trails and the Milky Way: A Beginner's Guide
- Why Photograph Star Trails and the Milky Way?
- Getting Started with Astrophotography
- Best Equipment for Photographing Stars
- Capturing Star Trails and the Milky Way
- Post-Processing Tips for Astrophotography
Capturing the beauty of star trails and the Milky Way is an awe-inspiring and rewarding endeavor for any photographer. Whether you’re a seasoned astrophotographer or a beginner, photographing the night sky can open up new opportunities for creativity and exploration. Star trails and the Milky Way are not just visually stunning—they also offer a glimpse into the vastness of our universe, making these photographs not only a technical achievement but also a deeply moving artistic expression.
Astrophotography requires a combination of patience, preparation, and technical knowledge. If you’re new to this genre, it's important to start by learning the basics of night photography. Unlike regular daytime photography, astrophotography requires capturing images with long exposures in low-light conditions. The key to success lies in understanding how to adjust your camera settings to gather enough light from stars and celestial objects while keeping the image sharp and clear.
1. Choose a Dark Sky Location
The first step in capturing beautiful star trails and the Milky Way is to find a location away from light pollution. Urban areas can significantly affect the quality of your images, so it's essential to head out into the countryside or a designated dark sky area. The darker the sky, the more stars you’ll be able to capture, and the clearer your Milky Way will appear. Websites and apps like Dark Sky Finder or Light Pollution Map can help you locate the best spots for stargazing.
2. Time Your Shot
Timing is everything when photographing star trails and the Milky Way. The best time to shoot the Milky Way is during the "Milky Way season," which typically runs from late spring to early fall, depending on your location. To capture star trails, choose a night when the sky is clear and the moon is less visible, as bright moonlight can wash out the stars. Additionally, you’ll need to check the time of the year and the position of the Milky Way, as it shifts its position across the sky throughout the year.
When it comes to astrophotography, the right equipment is crucial for success. While it's possible to take decent shots with a smartphone, a DSLR or mirrorless camera with manual settings is recommended for higher-quality images. Here’s what you’ll need to get started:
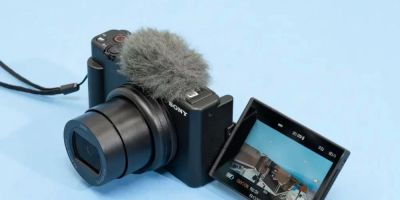
1. A DSLR or Mirrorless Camera
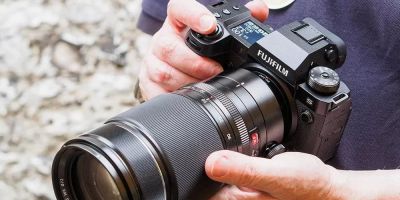
A camera with manual controls is essential for astrophotography, as it allows you to adjust settings like shutter speed, aperture, and ISO. Look for a camera that performs well in low light and has good high-ISO performance to reduce noise in your images.
2. A Wide-Angle Lens
To capture the Milky Way or star trails in their full glory, a wide-angle lens with a large aperture (f/2.8 or wider) is ideal. A wide field of view allows you to include more of the night sky, and a wide aperture ensures that enough light can reach the camera's sensor.
3. A Sturdy Tripod
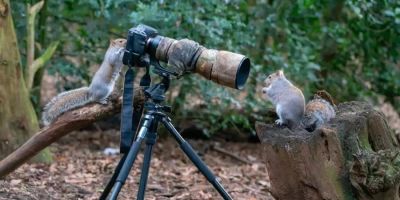
Since you'll be working with long exposure times, a stable tripod is essential to avoid camera shake and blurry images. A sturdy tripod ensures that the camera remains perfectly still throughout the exposure, resulting in sharp, clear shots.
4. A Remote Shutter Release or Timer
To minimize camera shake, use a remote shutter release or the camera's built-in timer to take your shots. This ensures you’re not physically touching the camera when the exposure starts, which could cause slight movement and blur.
Once you’ve set up your equipment and found the perfect location, it’s time to start capturing star trails and the Milky Way. Here are the key steps to follow:
1. Settings for Capturing the Milky Way
For Milky Way photography, start by setting your camera to manual mode. Use a wide aperture (f/2.8 or wider) and set your ISO between 1600 and 3200, depending on the light conditions and your camera's capabilities. A shutter speed of 20-25 seconds is typically ideal for capturing the Milky Way without star trails. If you want to avoid the stars turning into trails, make sure the exposure time isn’t too long.
2. Settings for Capturing Star Trails
To capture star trails, you’ll need to use a longer exposure time. You can either take one long exposure shot of 30 minutes or more or use multiple shorter exposures and combine them later in post-processing. Set your ISO to a lower number (around 400-800) and choose an aperture around f/4 or f/5.6 to ensure you don’t overexpose the stars. Remember that patience is key, as the longer the exposure, the more pronounced the trails will be.
After capturing your shots, post-processing is essential to bring out the best in your astrophotographs. With tools like Adobe Lightroom or Photoshop, you can enhance colors, reduce noise, and correct exposure. Here are a few tips to improve your star trail and Milky Way photos:
1. Stack Multiple Images
If you're shooting star trails, consider stacking multiple shorter exposures in post-processing to create a smoother and more defined trail. Software like StarStaX or Photoshop can help you stack these images efficiently.
2. Adjust the White Balance
Astrophotography often benefits from adjusting the white balance to remove any unwanted color casts, such as a yellowish or blue tint. Try setting the white balance to "daylight" or manually adjust it to get the best color balance for the stars.
3. Noise Reduction
Long exposure times can introduce noise into your images, especially at higher ISOs. Use noise reduction tools in Lightroom or Photoshop to minimize graininess and make your images cleaner and more professional-looking.
Photographing star trails and the Milky Way can be a challenging but incredibly rewarding experience. By using the right equipment, mastering camera settings, and practicing your technique, you'll be able to create breathtaking images that showcase the wonders of the night sky. If you're looking for the best photography gear to help with your astrophotography, check out Photo Studio, where you'll find everything you need to enhance your experience.

