
- how-to-photograph-reflections-in-water-step-by-step
- understanding-light-and-water-surface-characteristics
- choosing-the-best-gear-for-water-reflection-photography
- real-world-cases-and-photographers-stories
- expert-advice-and-creative-reflection-photography-techniques
1. How to Photograph Reflections in Water Step by Step
Mastering how to photograph reflections in water starts with a patient observation of your environment. The best water reflection photography often comes from simply noticing how the world is mirrored on the surface.
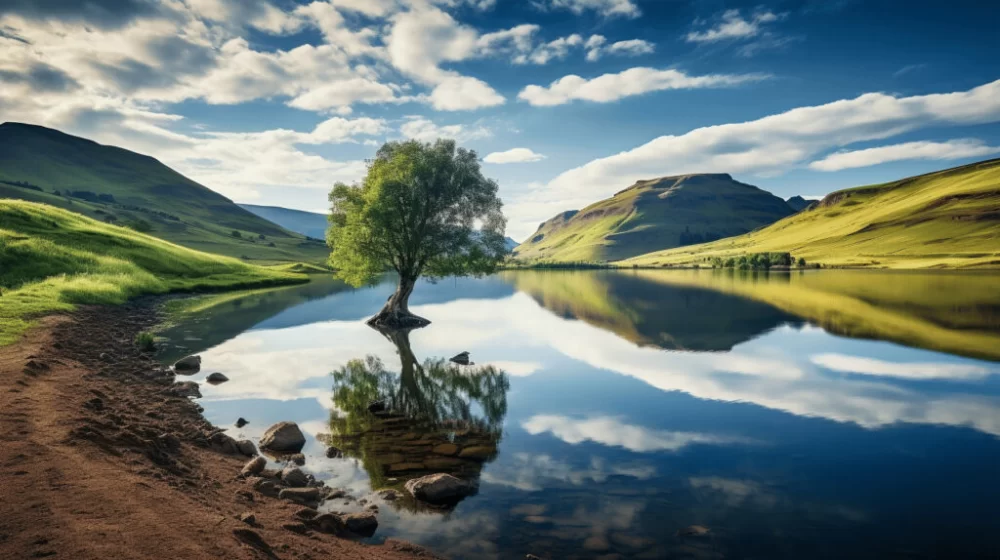
To begin, try visiting a calm lake or a quiet pond at dawn or dusk. The stillness of the early morning, paired with softer light, creates the perfect scene for capturing those pristine water mirror effects. Even urban puddles after rain can surprise you with abstract city reflections.
The essential first step is to find a reflective surface that is as smooth as possible. Windless conditions will help maintain a glass-like appearance, while any disturbance, such as ripples from wind or wildlife, can add texture or distort the reflection for creative results. Adjust your composition so that the reflection either takes center stage or complements the main subject, like in classic landscape water reflection shots.
For anyone starting out, try experimenting with angles. Crouch low to the ground to get closer to the water, which helps emphasize the reflection. Sometimes, flipping your photo upside down during editing can create an artistic, almost dreamlike effect—something you often see in landscape magazines and professional portfolios.
2. Understanding Light and Water Surface Characteristics
A crucial factor in water reflection photography is the interplay between light and the water’s surface. The quality and direction of light transform the mood and clarity of reflections. During golden hour, the sun’s low angle brings out vibrant colors, while midday light can be harsh and less flattering for mirror-like reflections.
Pay close attention to the water's texture. Perfectly calm water creates sharp, mirror-like reflections, often sought after for landscape reflection shots. In contrast, slightly disturbed water introduces a painterly, abstract feel—think of famous photos of city lights shimmering in a river. If you’re aiming for a classic water mirror effect, patience is key. Wait for the wind to settle, or visit sheltered areas surrounded by trees or buildings that block gusts.
For more creative approaches, try capturing the effect after rain, using puddles as tiny mirrors. Many iconic photo reflections have come from street photographers noticing unexpected moments in small water surfaces.
3. Choosing the Best Gear for Water Reflection Photography
The right gear can make a significant difference in the quality of your water reflection images. Wide-angle lenses are favored for landscape water reflection photos, as they help include both the scene and its reflection. For urban reflections or smaller details, a standard or macro lens allows you to get closer and capture more intricate patterns.
A tripod is nearly indispensable, especially in low-light conditions when a slower shutter speed is required. It ensures that both the scene and its reflection remain sharp. Neutral density (ND) filters can also help you control exposure, allowing for longer shutter speeds that smooth out the water’s surface, enhancing that surreal, mirror-like look. Polarizing filters, on the other hand, reduce glare and let you play with how much reflection you want to reveal or conceal.
If you’re in search of the perfect equipment or advice, consider visiting Photo Studio for carefully selected cameras, lenses, and accessories designed to help you master the art of reflection photography. Their professional staff can guide you to the best choices for your style and goals.
4. Real World Cases and Photographers' Stories
To make water reflection photography truly engaging, it’s inspiring to look at stories behind famous shots. One notable example is the viral photo of a mountain reflected perfectly in a calm lake at Banff National Park. The photographer spent several mornings scouting the area, waiting for windless conditions. His persistence resulted in a photo that became a staple image for travel brands and even inspired others to visit the location.
Another fascinating story comes from street photographers who capture the reflections of neon signs in city puddles, often after a sudden rain. One photographer shared how, after a rainy evening in Tokyo, she found endless compositions in sidewalk puddles, creating a series of moody, cinematic images that later went viral online.
These cases show that capturing stunning photo reflections is not just about luck, but also about observation, patience, and understanding the subtle interaction between light, water, and your subject.
5. Expert Advice and Creative Reflection Photography Techniques
Seasoned photographers often share that the magic of reflection photography comes from experimentation. Try using manual focus to ensure sharpness where you want it, especially when the camera’s autofocus gets confused by reflections. Bracketing exposures can help in challenging light, especially if you want to balance the brightness of the sky and its reflection.
For more abstract results, consider intentionally introducing ripples or throwing a small pebble into the water just before taking the shot. This creates unique patterns and can turn a straightforward reflection into something truly artistic. Blending long exposure with light movement opens a new world of creativity—just think of light trails reflected in water at night.
Above all, remember to have fun and be curious. The best water reflection photos often come from unexpected places and spontaneous moments. For those wanting to take their skills further, Photo Studio provides workshops, guides, and one-on-one coaching, ensuring you have all the support you need on your creative journey.


