
- Understanding-Studio-Lighting-for-Portraits
- Key-Elements-of-a-Portrait-Studio-Light-Setup
- Step-by-Step-Guide-to-Setting-Up-Studio-Lighting
- Common-Portrait-Lighting-Setups-Explained
- Tips-for-Optimizing-Your-Studio-Lighting
- Real-Life-Case-Study-Studio-Lighting-in-Action
Understanding Studio Lighting for Portraits
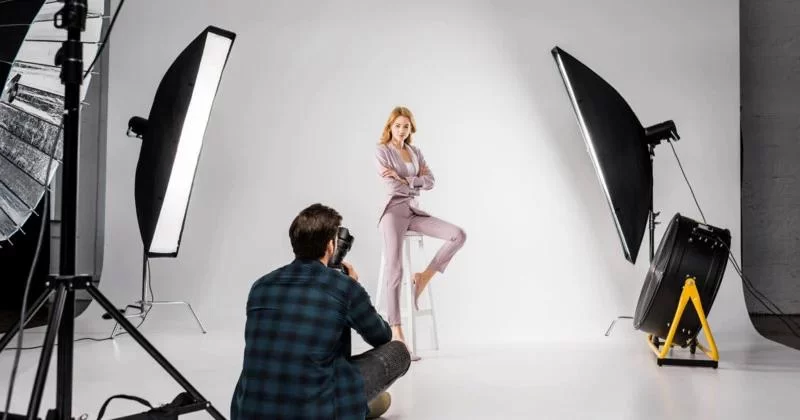
Studio lighting is a fundamental aspect of portrait photography that can dramatically affect the mood, tone, and overall quality of your images. Knowing how to do a studio light setup for portraits involves more than just placing lights randomly. It requires understanding the behavior of light—its direction, intensity, quality, and how it interacts with the subject’s face and surroundings. When done correctly, studio lighting not only highlights the subject’s features but also adds depth and dimension, creating a captivating visual story.
Unlike natural light, studio lighting gives you full control over these variables. This control is what allows professional photographers to consistently produce stunning portraits regardless of the time of day or weather conditions. At Photo Studio, we believe mastering this control can elevate your photography to new heights.
Why Controlled Lighting Matters
Controlled lighting helps in reducing harsh shadows, preventing unwanted reflections, and shaping the subject's face to enhance natural beauty or create dramatic effects. For example, a softbox placed at a 45-degree angle creates soft, flattering shadows that add depth without overwhelming contrast, which is ideal for most portrait sessions.
Key Elements of a Portrait Studio Light Setup
Before diving into the technical steps, it’s important to familiarize yourself with the essential components of a studio light setup:
1. Main Light (Key Light)
This is the primary source of illumination, defining the overall look and feel. It controls where shadows fall and how the subject’s features are sculpted. Usually positioned at a 45-degree angle to the subject, the key light sets the mood—soft and gentle for beauty portraits, or hard and directional for dramatic portraits.
2. Fill Light
The fill light balances shadows created by the key light. It softens harsh contrasts without eliminating shadows completely, preserving natural depth and dimension. A reflector or a lower-powered light source often serves this purpose.
3. Background Light
This light separates the subject from the background, adding depth to the image. It can be used to illuminate the backdrop or create a halo effect, depending on your creative vision.
4. Hair Light (or Rim Light)
Placed behind or above the subject, the hair light highlights the edges of the subject’s hair and shoulders. This creates separation from the background and adds a polished, professional look.
Step-by-Step Guide to Setting Up Studio Lighting for Portraits
Now that you know the components, let’s walk through a practical setup that works well for most portraits:
Step 1: Position Your Key Light
Start by placing your main light 45 degrees to the left or right of your subject and slightly above their eye level. This angle creates natural shadows on the face, enhancing features like cheekbones and jawline.
Step 2: Add the Fill Light
Set your fill light on the opposite side of the key light, closer to the camera. Adjust its power to about half or less than the key light to avoid flattening the subject’s face. A reflector can also work if you don’t have a second light.
Step 3: Set the Background Light
Place a light directed at the background, aiming to brighten it just enough to separate it from your subject. This prevents the subject from blending into a dark background.
Step 4: Position the Hair Light
Place the hair light behind the subject, angled to highlight the top of their head and shoulders. This adds a professional touch by creating a subtle outline.
Step 5: Test and Adjust
Take test shots and carefully observe shadows, highlights, and overall balance. Adjust light intensity and positioning as needed to achieve the desired effect.
Common Portrait Lighting Setups Explained
Understanding standard lighting patterns can inspire your creativity and improve your workflow. Here are a few popular setups:
1. Rembrandt Lighting
Characterized by a triangle of light on the cheek opposite the key light, Rembrandt lighting offers a classic, dramatic look. It is ideal for adding mystery or emphasizing facial structure.
2. Butterfly Lighting
Also called Paramount lighting, this setup places the key light directly above and in front of the subject, creating a butterfly-shaped shadow under the nose. It’s flattering for glamour and beauty portraits.
3. Split Lighting
In split lighting, the key light illuminates one half of the face while the other remains in shadow, producing a strong, intense effect. This is often used for moody or edgy portraits.
Tips for Optimizing Your Studio Lighting
Lighting is an art as much as it is a science. Here are some professional tips to take your portraits to the next level:
Experiment with Light Modifiers
Softboxes, umbrellas, grids, and snoots can shape and soften your light in different ways. For example, grids focus light into a tighter beam, useful for accentuating details or creating dramatic effects.
Control Your Environment
Ensure your studio space minimizes reflections and ambient light leaks. Black flags or gobos can block unwanted light, helping maintain clean shadows and highlights.
Understand Your Subject’s Features
Tailor your lighting to complement the subject’s face shape and personality. A lighting style that works for one person may not suit another, so always adapt accordingly.
Use Light Meters or Histogram Tools
Measure light intensity accurately to avoid under or overexposed images. Many modern cameras and apps offer histograms that can guide your adjustments in real-time.
Real-Life Case Study: Studio Lighting in Action
One memorable project involved a portrait session for a professional musician aiming to showcase both vulnerability and strength. We employed a classic Rembrandt lighting setup using a key light with a softbox to gently sculpt the face, paired with a subtle fill light to maintain soft shadows. The hair light added a halo effect that separated the subject from a dark background.
The result was a series of portraits that captured raw emotion and professional polish, perfectly aligning with the musician’s personal brand. This session reinforced how a well-planned studio light setup transforms not only the technical quality but also the narrative power of portraits.
For photographers eager to replicate or experiment with such setups, visiting Photo Studio can provide access to a wide range of lighting equipment, expert advice, and professional services tailored to portrait photography needs.


