- Understanding Food Photography
- Essential Gear for Food Photography
- Lighting Techniques for Food Photography
- Styling Your Food for Photography
- Post-Processing Tips for Food Photography
- Real-Life Food Photography Examples
Understanding Food Photography
Food photography is more than just taking pictures of your meal—it's an art form that captures the essence and beauty of food. Whether you're a food blogger, chef, or simply a food enthusiast, knowing how to create stunning food photography can help elevate your content, whether it’s for social media, blogs, or cookbooks. The goal is to entice your audience by making the food look as delicious as it tastes, sparking a connection that goes beyond just the visual.
Essential Gear for Food Photography
To create stunning food photography, you need the right gear. While a professional camera can make a big difference, don’t feel pressured to invest in expensive equipment right away. Here are the essentials:
1. Camera
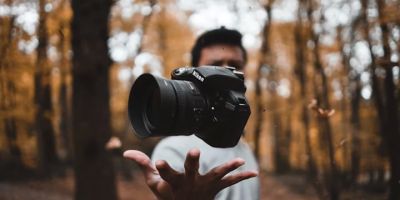
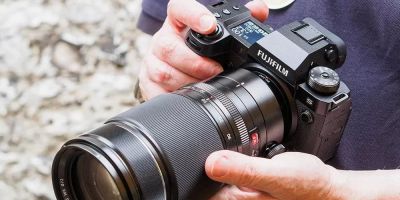
While a DSLR or mirrorless camera offers more flexibility and control, smartphones can also produce excellent food photos with the right techniques. Look for a camera that allows you to adjust settings such as aperture, ISO, and shutter speed to get the perfect shot.
2. Lens
If you're using a DSLR or mirrorless camera, a 50mm lens is often preferred for food photography due to its sharpness and ability to create a shallow depth of field. This allows the food to stand out from the background, creating a beautiful, professional look.
3. Tripod
A tripod is essential for ensuring stability, especially if you're shooting in low light or need to take longer exposures. It helps eliminate camera shake, ensuring crisp, sharp images.
Lighting Techniques for Food Photography
Good lighting is the cornerstone of great food photography. Here are some key lighting techniques to consider:
1. Natural Light
Natural light is often preferred for food photography due to its soft and flattering qualities. Position your food near a window, and avoid direct sunlight, which can create harsh shadows and uneven lighting. Overcast days can provide perfect diffused light for capturing food in all its glory.
2. Artificial Lighting
If you're shooting indoors without access to natural light, artificial lighting such as softboxes or ring lights can help mimic the effects of natural light. Use a diffused light source to soften the shadows and create an even, flattering light on your food.
3. Experiment with Shadows
Shadows can add depth and dimension to your food photos, but they should be used intentionally. A side or backlight can create dramatic, interesting shadows that enhance the texture of the food.
Styling Your Food for Photography
Styling your food is just as important as capturing the shot itself. The way the food is presented can make all the difference. Here are some tips for styling your food:
1. Keep it Simple
Don’t overcomplicate your food styling. Focus on making the dish look clean and inviting. A simple plate with a few garnishes can look more appealing than an overloaded plate.
2. Use Props Wisely
Props such as napkins, utensils, and backgrounds can complement the food and make the photo feel more dynamic. However, don’t let the props distract from the food. The dish should always be the star of the show.
3. Play with Composition
Consider the composition of your shot carefully. Use techniques like the rule of thirds to place the food in a visually pleasing way. Additionally, try shooting from different angles, such as overhead or at a 45-degree angle, to highlight different aspects of the dish.
Post-Processing Tips for Food Photography
Post-processing is where you can fine-tune your food photos and enhance the colors and details. Here are some tips to make your food photos even more stunning:
1. Adjust Exposure and White Balance
Ensure the exposure is balanced, and adjust the white balance to remove any unnatural color casts. This can help the food look more true-to-life and vibrant.
2. Sharpen the Image
Food photos should look crisp, so make sure to sharpen the details, especially when it comes to textures like sauces, garnishes, and crumbs. This will bring out the appealing aspects of the dish.
3. Enhance Colors
Enhance the colors of your food by adjusting saturation and vibrancy. However, be careful not to overdo it—natural-looking colors are key to creating an authentic food image.
Real-Life Food Photography Examples
To illustrate these tips, let's take a look at some real-life examples of food photography that have captured the attention of many:
Case Study 1: The Instagram Food Blogger
Sarah, a food blogger with a growing Instagram following, uses natural light and minimalist props to create simple yet captivating photos. By focusing on clean styling and vibrant colors, she has built a reputation for beautiful food photography that stands out in a crowded space.
Case Study 2: The Professional Restaurant Menu
John, a professional photographer, was hired by a local restaurant to shoot their new menu items. He used a combination of artificial lighting and carefully styled plates to make the dishes appear mouthwatering. The resulting images were featured on the restaurant’s website and social media, driving customer engagement and sales.
If you're looking for the right gear or need additional help perfecting your food photography, check out [Photo Studio] for the best products and services to enhance your photography experience.

