
- Importance-of-Lighting-in-Indoor-Photography
- Natural-Lighting-for-Indoor-Sessions
- Artificial-Lighting-Options-and-Techniques
- Combining-Natural-and-Artificial-Lighting
- Practical-Tips-for-Setting-Up-Indoor-Lighting
- Real-Life-Case-Study-Successful-Indoor-Photo-Session
1. Understanding the Importance of Lighting in Indoor Photography
Lighting is undeniably one of the most critical factors that influence the quality and mood of indoor photography sessions. Whether you’re shooting portraits, product photos, or artistic compositions, the way light interacts with your subject can make or break the final image. Unlike outdoor photography, where sunlight is abundant and variable, indoor photography requires careful planning and control of lighting sources.
The best lighting for indoor photography sessions not only highlights details and textures but also sets the tone, directs viewer attention, and creates depth. Without proper lighting, images can appear flat, dull, or overly shadowed, which diminishes their impact.
Photographers who master indoor lighting can produce consistent, professional-quality photos regardless of the time of day or weather conditions, making understanding this topic indispensable.
1.1 The Role of Light Direction and Quality
Light direction influences how shadows form on your subject, impacting texture and dimensionality. Soft, diffused light tends to flatter skin tones and reduce harsh shadows, whereas hard light can emphasize details and create dramatic effects. Understanding the interplay between light direction and quality is key for controlling the mood of your shots.
1.2 Common Challenges in Indoor Lighting
Indoor spaces often have mixed lighting conditions, combining natural light through windows with artificial bulbs, each with different color temperatures. This inconsistency can cause white balance issues and uneven exposure, complicating the shoot.
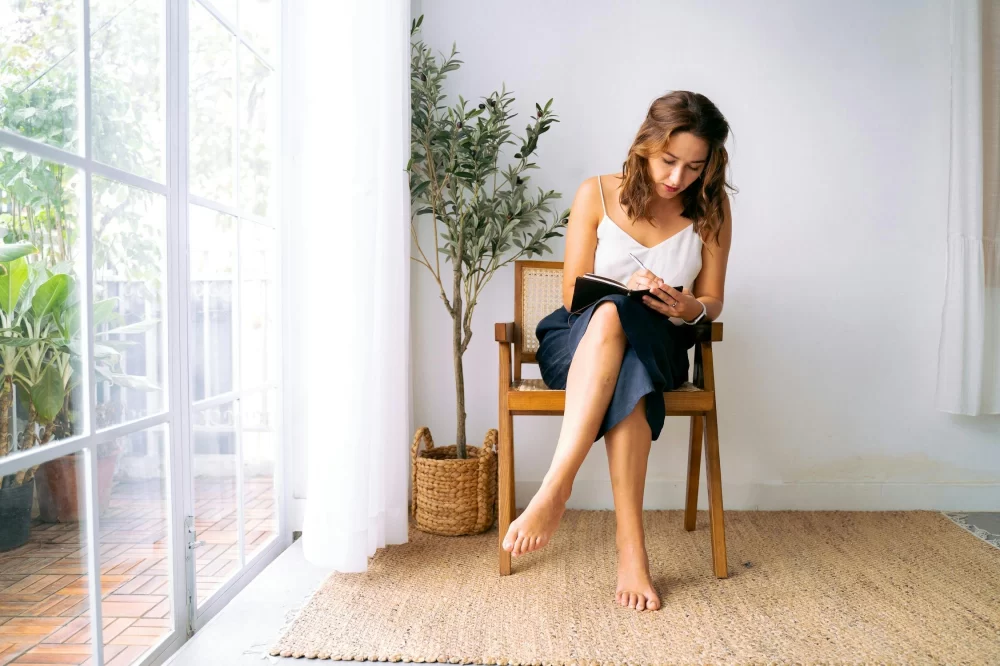
2. Leveraging Natural Lighting for Indoor Photography Sessions
Natural light is often the most desirable source for indoor photography because it produces soft, appealing illumination and can save on equipment costs. However, its availability is limited by time, weather, and the layout of the shooting space.
Positioning your subject near large windows with indirect sunlight offers the best results, providing even light that reduces harsh shadows and enhances natural colors. Morning and late afternoon typically offer the warmest, most flattering tones.
2.1 Techniques to Maximize Natural Light
Reflectors can bounce natural light into shadowed areas, balancing exposure and adding dimension. Using sheer curtains diffuses harsh sunlight, creating a softer glow on the subject. These simple tools dramatically improve indoor photos without the need for artificial lighting.
2.2 Limitations and How to Overcome Them
On overcast days or in rooms with limited window access, relying solely on natural light may result in underexposed or flat images. Here, supplemental lighting becomes necessary to achieve professional-quality results.
3. Exploring Artificial Lighting Options and Techniques
Artificial lighting allows photographers full control over brightness, direction, and color temperature, making it essential for consistent indoor photography sessions. Common artificial lighting sources include LED panels, softboxes, ring lights, and speedlights.
3.1 Choosing the Right Lighting Equipment
For portraits, softboxes and LED panels offer soft, diffused light that mimics natural sunlight, ideal for flattering skin tones and reducing shadows. Ring lights provide even illumination for close-up shots, popular in beauty and product photography.
3.2 Balancing Color Temperature
Artificial lights come in varying color temperatures, measured in Kelvin. For indoor shoots, matching your artificial lights’ temperature to natural light (around 5000-5600K) helps maintain color consistency. Using adjustable lights or gels can fine-tune this balance.
3.3 Modifying Light for Desired Effects
Light modifiers like diffusers, umbrellas, and grids help control spread and hardness of light. Experimenting with these tools lets photographers create anything from dramatic shadows to soft, dreamy looks that elevate indoor photography.
4. Combining Natural and Artificial Lighting for Optimal Results
One of the most effective approaches to indoor photography is blending natural and artificial lighting. This hybrid method provides flexibility, allowing photographers to leverage natural light’s beauty while filling in shadows or enhancing details with artificial sources.
4.1 Creating a Balanced Lighting Setup
For example, using window light as the primary source and adding a softbox or reflector opposite the window can fill shadows without overpowering the natural ambiance. This balance results in images that look both natural and polished.
4.2 Adjusting for Time of Day and Location
As natural light changes during the day, artificial lighting can be adjusted accordingly to maintain consistent exposure and mood. This adaptability is especially important for long sessions or commercial shoots requiring uniformity.
5. Practical Tips for Setting Up Indoor Lighting for Photography Sessions
Setting up indoor lighting effectively requires planning and experimentation. Below are some practical strategies to achieve the best lighting for indoor photography sessions:
5.1 Plan Your Shoot Around Available Light
Scout your location in advance and note the direction and intensity of natural light throughout the day. Schedule shoots when light is optimal or prepare to supplement with artificial sources.
5.2 Use Multiple Light Sources
Combining key lights, fill lights, and backlights helps create depth and dimension. Key lights provide the main illumination, fill lights reduce shadows, and backlights separate the subject from the background.
5.3 Experiment and Adjust
Don’t hesitate to move lights, change their height or intensity, and use different modifiers to achieve the desired effect. Reviewing test shots on your camera ensures you’re capturing the look you want.
5.4 Invest in Quality Equipment
While budget constraints are real, investing in reliable lighting gear pays off in image quality and ease of use. If you’re unsure what to buy, visit Photo Studio where you can find tailored recommendations for lighting equipment and accessories perfect for indoor photography sessions.
6. Real-Life Case Study: Achieving Stunning Portraits Using Balanced Indoor Lighting
Photographer Emily had been struggling with flat, uninspired portraits in her indoor shoots. After researching lighting techniques and experimenting with a combination of window light and affordable LED panels, she noticed a remarkable difference.
By positioning her subject near a north-facing window and using a softbox as a fill light on the opposite side, Emily created a beautifully balanced light setup. This method softened shadows while maintaining natural highlights on her subject’s face, resulting in vibrant, engaging portraits that her clients loved.
This case underscores how understanding and applying the best lighting for indoor photography sessions can transform your work. If you want to try similar setups or need expert advice on lighting tools, Photo Studio offers personalized services and equipment recommendations to help you achieve professional results.


